Top Tips to Help You Through the Process of Publishing a Children's Book
May 26th, 2020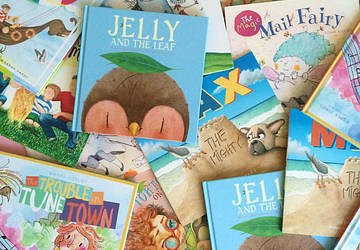
Whether you’ve published before or are completely new to the industry, here are some useful things to know that will help break down the publishing process; from the relationship with your illustrator, to the general publishing timeline … here is some inside knowledge and tips to help you through your publishing journey.
Getting Started
Your manuscript is complete and is being assessed by an editor or publisher. If the book is a picture book or junior reader, have you chosen an illustrator? Your editor can give you a list of suggested artists and you can let them know your preferences.The editor will contact the illustrators one at a time to see if they are available so make sure you are certain before choosing your preferred illustrators. Most illustrators prefer to be contacted by a representative from the publishing company rather than the author.
The illustration process starts once the edit is complete, and is coordinated by the editor and designer to ensure the layout is correct for design and printing, and to get the most out of the storyboarding.
What kind of TIMELINE does this all take?
The edit can take anywhere between 2-4 weeks (or more if it’s an adult or chapter book) and the illustrations are usually given a timeline of 3-5 months for final delivery. The stages are outlined below:Edit: 1 month
Illustrations: 3-5 months
Design: 2 weeks to 1 month
Print and Freight: 3 Months
Sometimes the process is longer, and sometimes it’s shorter. Think of it like a baby, only with a slightly more flexible gestation period!
After the book has been printed (in China), a few advance copies are flown out ahead of the final shipment and you will be sent your first copy.
The Editing Process
The edit is made up of several tasks. As well as proofing the manuscript for grammar and spelling, your editor will look for certain points of the story that could be strengthened. The aim is not to chop up your book into something you can barely recognise (your editor can’t do this, and has no wish to), but if certain words, phrases or sections would be better with something substituted, they will suggest this to you.If the manuscript is considered to be quite long for its age target, the editor may ask you to cut down some of the text. The idea of cutting your manuscript may be a little terrifying at first, but this will be suggested only to improve the book’s readability and marketability.
To use an extended metaphor: think of it like baking a cake ... too many ingredients and the reader will become unwell; too much of one ingredient and not enough of another will affect the mix and we might end up with a floury or gluggy cake; and baking a child’s birthday party cake with ingredients for a mature fruit cake will only end up being tasty for adults!
Your editor will be familiar with popular topics and word lengths for each age group. Some children will read more advanced material than others and there are certainly books that appeal to a larger range of ages but for the purposes of being clear for bookstores it is important to be exact. For example: an age range of 4-10 years is too wide as children aged four are learning to read whilst a junior reader might be 10,000 word stories. Your editor will workout if there is a clash with the age range and let you know.
The Illustration Process
Once the edit has been completed, the illustration process begins - hurray! Your editor and designer will set up a timeline with the illustrator. This is your chance to specify anything you would like illustrated in a certain way (e.g. Tim the cat is big, fat and ginger with straggly whiskers). Before storyboarding, there may be some character sketching to decide the look of the main characters. Let the editor/illustrator know your inspiration and desired feeling for your book.Storyboarding is when the illustrator creates thumbnails of the action presented on each image. These are black and white and rather rough in style, so won’t give the exact detail that will come in the final work. Once the storyboard comes in there will be a bit of to-ing and fro-ing as the editor and designer suggest changes to improve the spreads. The illustrator will then revise the thumbnails if necessary. Once the storyboarding is complete the content is locked off.
From here, the illustrator will take some time to produce black and white final linework (known as roughs). This is checked by the editor and designer to make sure the content has come across truly and beautifully from the storyboard version.
Once this is approved, the illustrator goes away again for the final time and finishes the colour. The art or files are then delivered by post or digital files. Then just wait to see the first designs of your book!
The Illustrator
Below are a few pointers on keeping the relationship with your illustrator positive and efficient:- Try not to overprescribe content: the book has been written and the characters have been created by you, however it is necessary for you to trust the artist’s representation of your work. Directing every single aspect of the work will constrict the process for the illustrator. Creating a picture book is a collaborative effort, and makes for the best possible picture book.
- Style guidance: if you have chosen the artist based on a certain style you saw in their portfolio, refer to this so they know what you want to go for, but avoid trying to steer an artist down the track of a different style ... this will almost always end up a little messy ... for both the book and the creative relationship!
- Giving feedback and notes: send your notes directly back to your editor with all your thoughts, not the illustrator. This way, they can go through everything with you and make sure that both your notes don’t clash. They can also be the one to pass on the notes to the illustrator as certain wording like ‘his paws look a bit funny’ or ‘the mum needs to be standing there instead’ can be unclear for the illustrator to improve on, and may clash with other content. You want to make sure your relationship with your illustrator is positive!
- Once decisions are made - stick to them unless it’s unexpectedly something technically incorrect: changing content late in the process or going backwards and forwards with different options will make inefficient use of the illustrator’s time, and strain the process. Unload all your thoughts and wishes with the editor, and they can sort it out with you earlier in the stages!
The Design Process
The designer works closely will the illustrator throughout the process. The designer will be constantly reviewing the art or files that come in to make sure they are consistent, affective and suitable. If there are any technical issues or images that need tweaking they will sort this out.The design also consists of digitally layering the text over the illustrations and making sure they are correctly aligned, looking colour-true and setting up the layout of the book for print.
Your Designer
Design requires both individual taste in aesthetic, technical knowledge, skill and objective construction.When giving feedback it is important to explain what you are hoping to achieve with any suggested change. For example: if you comment: ‘Can we make it more bold?’ is this because you find the current size/colour/font type difficult to read or because you want it to stand out comparatively to the creator names? By knowing exactly what the issue is, it is easier to figure out how to fix it (as it is likely to affect other factors in the design).
With any request for a change, the designer will be considering how this affects the entire book as a whole as consistency throughout the book is incredibly important.
Signoffs
When the PDF proofs of the design are finished – the first signoff needs to be completed. This is when you approve all the files. No changes to actual content happens at this stage; it is purely for checking all details are correct and that the printers have received a correct print layout.There is then a second signoff, after which you just wait for the advanced copy!
Interested in publishing through Little Steps? We would love to consider your manuscript!
Submission details below:
Comments (0)
No comments have been submitted yet.
Why not be the first to send us your thoughts
Leave A Comment
Thank you for your comments,
they will appear shortly once approved.
TOPICS
RECENT POSTSHAVE YOU SEEN...1
Meet Daria and Alexandra - the creators of Guardians of the Four ForcesApril 28th, 20262
We caught up with Beverly Jatwani on her latest release - Flying HighApril 23rd, 20263
Sit down Q&A with Hershey Gargash, Author of Wixie the WormApril 23rd, 20264
Billy Bear's Brown Hair by Dina O.NasrSeptember 25th, 20255
The Slug Who Flew by Daniel CouzensSeptember 25th, 20251
Meet and Greet - Introducing the Kids to Your Partner for the First Time by Rachel BraceJuly 28th, 20212
Top Tips on How to Write a Junior Fiction/Middle Grade BookJuly 30th, 20213
Get to Know Beverly Jatwani, Author of Pedro the Puerto Rican Parrot!May 5th, 20214
Meet Chi Mary KaluOctober 29th, 20195
Inside the Illustration Process of Inner with Aleksandra SzmidtOctober 2nd, 2021